
Assembling of the Bustier Corset | Sewing Tutorial #4
- Jul 13, 2021
- 5 min read
Updated: Nov 3, 2025
Let’s move to the last unprepared and unfinished piece – the front center. We make the upper seam. We stitch without a bar tack. I often don’t make bar tacks when sewing such delicate fabrics and I also try not to sew over pins. The seam is made and it is necessary to remove all pins or to unpin all pieces.

CLICK HERE TO DOWNLOAD THE PATTERN:


I unfold the mesh. You, certainly, remember that the mesh serves as the lace lining. I will stitch on the mesh in 1 mm from the previous stitching, tacking seam allowance. This stitch will help to turn over the pieces neatly. And I don’t make a bar tack again. It is necessary to trim the excess seam allowance.

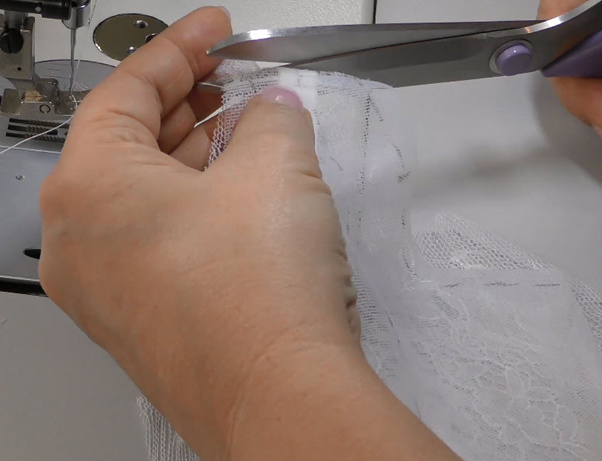
I fold the upper seam carefully, move bone casing aside for now and join lace with mesh along the piece perimeter and the cup sewing line. I also make basing along the central marking line to indicate the center line and to completely eliminate the deformation of the central piece, which is the most visible and the most beautiful corset piece. Similar to the previous pieces, I cut a thread in the corners of the piece to ensure easy thread removal later.


Now we need to bend the bone casing on the lace right side and place it exactly in the center. I pin the casing along the top of the piece, make the beautiful fold and turn over the piece with mesh facing up to see the marking clearly. Attach the bone casing with many pins to prevent waves and its shift from the marking. It is better to insert pins perpendicularly to the casing or at angle. This will make it easier to pull them out while sewing.


I stitch the bone casing with two strengthening lines in 1 mm from the edge. I make bar tacks. We should cut the thread ends right away.


So, we attached the tunnel for the front central bone. It is compulsory to check the wrong side as the bone casing should be exactly in the center. And, of course, you can evaluate your first machine stitching line.


Let’s assemble the corset body. Take the prepared pieces and the bone casing. Let’s start with the back, so that you are not scared to mess something up from the start.
I take two back pieces (the central and side pieces) and place them wrong side together, so that seam allowances are on the right side when I stitch the vertical curve. It is a rule: all pieces of sheer corsets are stitched with seams to the right side. I align the curve and stitch the pieces together with 1.2 cm seam allowance. It is up to you to make or not to make a bar tack. Most often I don’t make them as there will be machines stitches over this stitching, for example, stitching of the bone tunnel. Bar tacks at the start and the end can add unnecessary thickness. As a rule, I make only first stitching with a bar tack along the curve and the remaining stitches are made without them. The width of stitch is 2.5 mm, however, I often use 3 and 4 mm stitches. Remove the thread, which joins mesh and lace along the curve, when you finish the strengthening stitching. You see why we cut the basting in the corners of the pieces. When we remove the basting along the curve, we do not break the joining between lace and mesh on the other cuts.


Now we need to decide in which direction we will fold seam allowance for stitching the tunnel: toward the back center or toward the side seam. The choice is only for esthetic reasons. The way you fold seam allowance will affect whether you sew the bone casing on the center or the side piece, so visually one piece will look narrower and the other one wider. So, choose what you prefer: the back side piece or the center piece.
We will attach a hook and eye tape to the back central piece. This tape has its width and decorative trim. Therefore, it is worth folding seam allowances toward the side piece.

Once you determine the position of the back curve seam allowance, place the sewn back half in front of you, fold seam allowances toward the side piece and place the bone casing over this seam allowance. Now hold seam allowance and lift the pieces a bit. They will fold in the air. Place the pieces on the table with the bone casing facing up.


Place the bone casing over the seam allowance, so that it overlaps the stitching by 1 mm. Stitch on a sewing machine in this position in 1 mm from the casing edge. Ideally, the seam of the bone casing should run along the piece joining seam. I cut the bone casing only when the joining seam is made.


Now we need to cut the excess seam allowance as it should be narrower than the bone casing. You might ask why we don’t provide for narrower seam allowances earlier as in the cup. The thing is that it is much easier and more precise to join the pieces with the wider seam allowances. It is much harder to work with the narrow seam allowances. Sometimes it makes more sense to spend time cutting the excess seam allowance than to bother with the narrow one.

Then I open the pieces, stretch and pull them by hand in different directions from the curve, and I stitch along the second side of the bone casing also in 1 mm from the edge.


The bone casing is stitched and the seam allowance is finished. Make sure to check that there is no a bulge in the joining stitch on the wrong side. The joining stitch should be flat, smooth, even and straight. Both machine stitching lines should be parallel.


It is time to conduct the necessary test. Take the plastic bone, which you prepared for this corset. Round its edge and it is enough to cut the sharp ends with scissors. Try to insert this bone into the bone casing and check whether the seams are too close to the bone and prevent its insertion. If everything is done correctly, the bone should be inserted easily into the bone casing and it is well-placed and it doesn’t twist.


Our test is successful, so we can proceed.
We use the same method to join the curve of the second back half.
In the assembling of the bustier corset, every detail matters — alignment, tension, and finishing. Mastering this stage ensures your corset not only fits beautifully but also reflects the skill and care behind its creation.
Important note: don’t forget which direction to fold the seam allowance. We fold the seam allowance towards the side seam on the first half, so that you need to do everything symmetrically.

CLICK HERE TO DOWNLOAD THE PATTERN:


